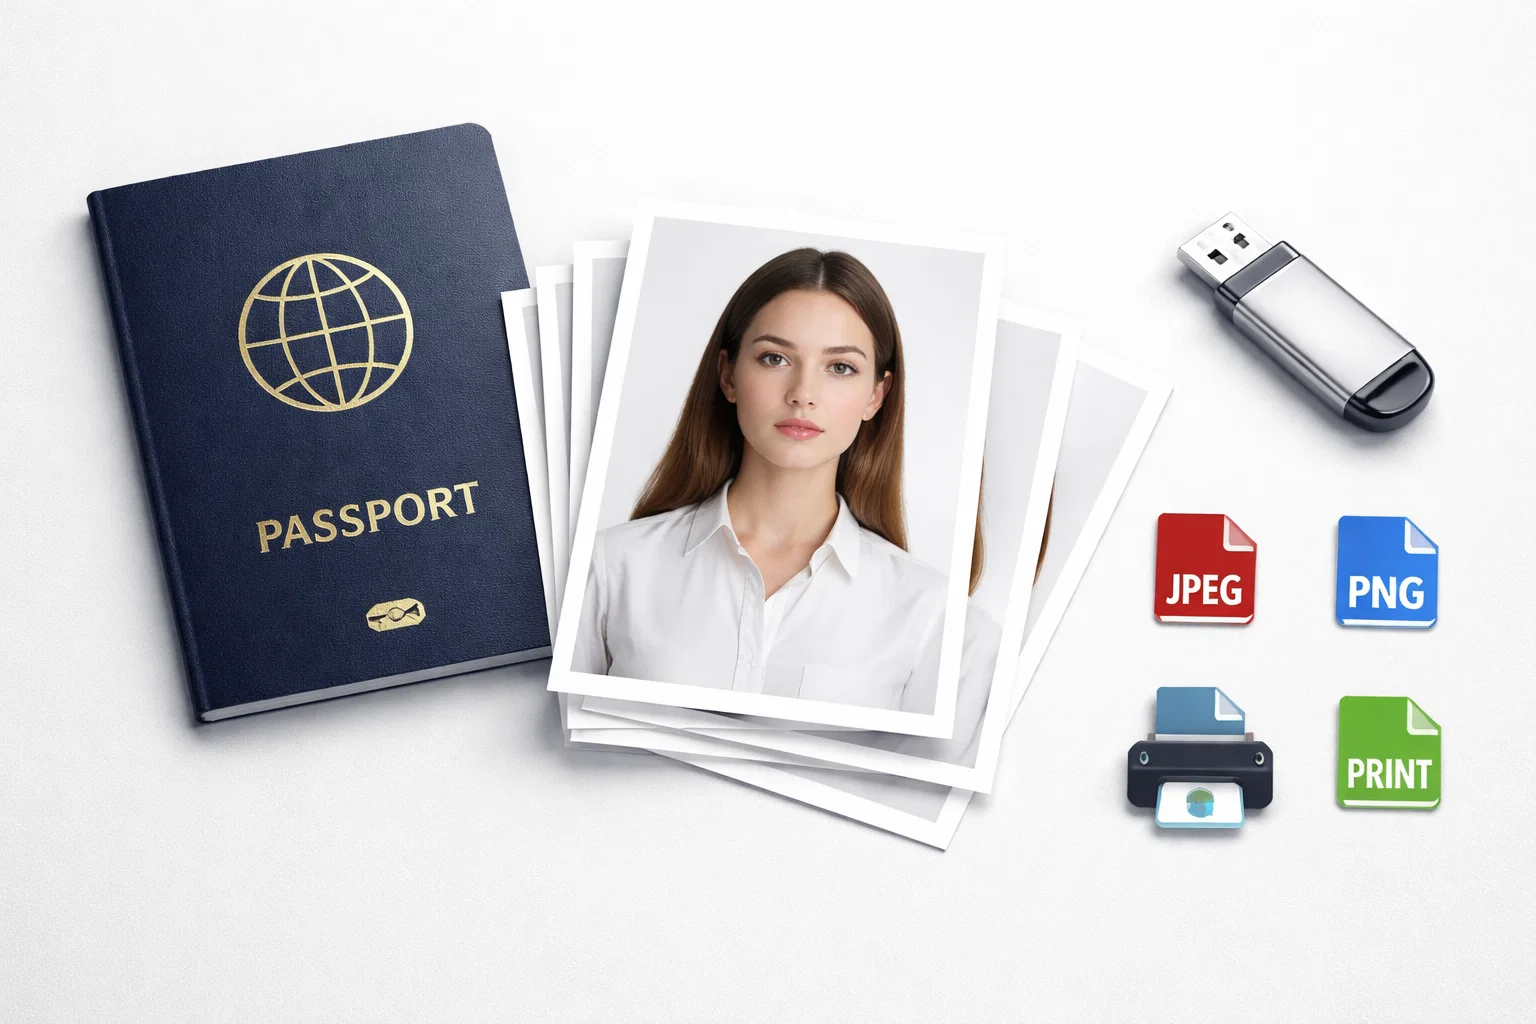
When it comes to applying for a passport or visa, getting the photo right is non-negotiable. One of the key factors to ensure that your photo is accepted is the format. Whether you are submitting your photo digitally or in print, choosing the correct file type (JPEG, PNG, or print-ready) is crucial for success.
In this article, we’ll explore the best passport photo format tool available for creating compliant photos in JPEG, PNG, and print-ready formats. With the increasing need for speed and convenience in today’s digital world, these tools save time and stress, especially for those who are on tight deadlines or working remotely.
Why is format so important?
Your passport photo’s format is more than just a technical detail—it ensures that your photo meets biometric standards and government photo specifications. Choosing the right format guarantees smooth application processing and helps avoid potential delays caused by photo rejection.
In the following sections, we’ll guide you through the top tools for creating JPEG, PNG, and print-ready passport photos that will pass government standards. Plus, we’ll highlight PhotoGov as a standout service known for its 100% acceptance rate.
Why Format Matters for Passport Photos
When you apply for a passport or visa, getting your photo format right is more important than you might think. Governments around the world have strict guidelines for passport photos to ensure they can be processed by biometric systems smoothly. But, why exactly does the format matter? Here’s why:
1. Passport Photo Requirements by Government
Each country has specific requirements for passport and visa photos. These include precise dimensions, file size limits, and biometric standards. If your photo doesn’t meet these standards, your application might be rejected, leading to unnecessary delays.
Here’s a quick overview of common passport photo guidelines:
- Dimensions: Typically, passport photos are required to be 35mm x 45mm, but these can vary depending on the country.
- File Size: Most countries have a size restriction for digital photos, typically between 500 KB to 1 MB.
- File Type: Acceptable file formats for passport photos usually include JPEG and PNG. These formats ensure compatibility with government processing systems.
- Head Position: Your head must be centered, with a neutral expression and no shadows.
- Background: The background should be plain white or light-colored, with no distractions or patterns.
This is where the file format comes in. If your photo is not in the correct format, even if the dimensions and background meet the requirements, it may still be rejected due to technical issues such as resolution or color profiles.
2. The Role of JPEG, PNG, and Print-Ready Formats
There are a few file formats commonly used for passport photos. Each format has its pros and cons, especially when it comes to digital submissions or printing your photo.
JPEG Format:
- Widely Accepted: JPEG is the most common file format for passport photos and is accepted by most government agencies.
- Compression: JPEG uses lossy compression, meaning some image data is discarded to reduce file size. However, this typically doesn’t affect photo quality when saved at high resolution.
- Ideal for Digital Submissions: JPEG is often preferred for online passport photo applications due to its smaller file size and compatibility with online forms.
PNG Format:
- No Compression Loss: Unlike JPEG, PNG is a lossless format, meaning it retains all image data, leading to slightly higher file sizes. This can be helpful if you’re concerned about preserving image quality.
- Transparency: PNG files can support transparency, which might be useful for certain types of photo editing, but not typically required for passport photos.
- Higher Quality for Print: For print-ready formats, PNG is a good choice because it maintains image quality at a larger scale.
Print-Ready Formats:
- When preparing for physical submissions, you’ll need your passport photo to be print-ready. This means it should meet specific resolution and size requirements for printing.
- 300 DPI (dots per inch) is standard for print-ready photos to ensure clarity and detail when printed.
3. The Impact of Wrong Format Choices
Choosing the wrong format could lead to:
- Rejection of your passport photo if the file size is too large or too small.
- Printing issues, where your photo could come out blurry, pixelated, or cropped incorrectly.
- Delay in application processing if the photo doesn’t meet the required biometric standards.
To avoid these problems, it’s essential to use the right tools and formats when creating your passport photo.
Top Passport Photo Format Tools: JPEG, PNG & Print-Ready
Now that we understand why the passport photo format is so important, let’s dive into the best tools available to help you create the perfect photo in JPEG, PNG, and print-ready formats. Whether you’re looking to quickly convert your photo to the right format or need a more detailed photo-editing tool, there are many options out there.
Let’s break down the top passport photo format tools that will help you create compliant photos for your passport or visa application.
1. PhotoGov: The Best Overall Service
-
Why It’s the Best: PhotoGov is known for its high accuracy and 100% acceptance rate with passport photo applications worldwide. This tool ensures your photos meet all biometric requirements, including proper background, head size, and file format.
Key Features:
- Supports JPEG and PNG formats.
- Provides print-ready files at 300 DPI, making it ideal for physical submissions.
- Automatic biometric compliance check to ensure your photo meets international standards.
- Fast and easy to use—upload a photo, and it’s ready to download in minutes.
- Money-back guarantee if your photo is rejected due to technical issues.
Ideal For: Those looking for an all-in-one solution for both digital and print-ready passport photos.
2. PhotoAiD: AI-Driven Passport Photo Tool
-
Why It’s Great: PhotoAiD uses artificial intelligence (AI) to ensure your photo meets official passport standards. It automatically detects errors in your photo, such as improper head size or background issues, and corrects them for you.
Key Features:
- Supports both JPEG and PNG formats.
- AI-powered compliance checker for quick fixes.
- Provides print-ready photos with high resolution.
- Fast processing: receive your photos ready for download in minutes.
Ideal For: Users who want a quick and automated solution with AI that checks compliance.
3. IDPhotoStudio: Free & User-Friendly
-
Why It’s Great: IDPhotoStudio is a simple, free tool that allows you to create passport photos in both JPEG and PNG formats. While it doesn’t offer the sophisticated compliance checking of tools like PhotoGov or PhotoAiD, it is a great option for those on a budget.
Key Features:
- Free to use, with no hidden fees.
- Supports JPEG format.
- Allows for easy resizing and cropping to meet standard dimensions.
- Prints multiple passport photos on one sheet for convenience.
Ideal For: Budget-conscious users who just need basic resizing and cropping without advanced features.
4. Passport Photo Online: Online Photo Editing Tool
-
Why It’s Great: Passport Photo Online is an easy-to-use service that can help you quickly convert your photo to JPEG or PNG and ensure it meets passport photo standards. The tool checks compliance automatically, reducing the chances of rejections.
Key Features:
- Supports JPEG and PNG formats.
- Instant biometric compliance check with a preview of the final photo.
- Provides print-ready photos in various sizes.
- Cost-effective: Available for a low fee, with instant downloads.
Ideal For: Those who need a fast and reliable online tool for creating passport photos that meet the required specifications.
5. Snapshooter: Mobile App for Passport Photos
-
Why It’s Great: Snapshooter is a mobile app designed for users who need to create passport photos on-the-go. It works seamlessly with your phone’s camera and ensures your photos meet the required biometric and file format standards.
Key Features:
- Supports JPEG and PNG formats.
- Provides print-ready photos at 300 DPI.
- Real-time photo preview showing compliance.
- Simple to use with mobile editing features.
Ideal For: Those who need a mobile solution for creating passport photos with a high degree of flexibility.
Comparison of Passport Photo Format Tools
Here’s a quick comparison table to help you decide which passport photo format tool best fits your needs:
| Tool | Formats Supported | Key Features | Ideal For |
|---|---|---|---|
| PhotoGov | JPEG, PNG | 100% acceptance, print-ready, biometric compliance check | All-in-one solution for digital and print |
| PhotoAiD | JPEG, PNG | AI-powered compliance check, print-ready photos | Automated AI compliance |
| IDPhotoStudio | JPEG | Free, easy resizing and cropping | Free, basic tool for resizing and printing |
| Passport Photo Online | JPEG, PNG | Instant compliance check, low-cost, print-ready photos | Quick, reliable online photo editing |
| Snapshooter | JPEG, PNG | Mobile app, real-time preview, print-ready | Mobile solution for passport photos |
These tools ensure your passport photos are compliant with international standards while offering different features depending on your needs. Whether you need a quick fix or a fully automated solution, there’s something for everyone.
How to Use Passport Photo Format Tools: Step-by-Step Guide
Now that we’ve reviewed the top tools for creating JPEG, PNG, and print-ready passport photos, let’s break down the process step by step. Whether you’re using PhotoGov, PhotoAiD, or another tool, the process is relatively simple and ensures your passport photo is compliant and ready for submission.
Here’s how to create your perfect passport photo using these tools:
Step 1: Upload Your Photo
First, choose a recent photo of yourself that meets the basic guidelines:
- Ensure you have a neutral expression, with both eyes open.
- The background should be plain and light-colored (usually white or off-white).
- The lighting should be even, with no shadows on your face or background.
Most tools allow you to upload your photo directly from your computer or smartphone. For apps like Snapshooter, simply take a photo with your phone’s camera directly within the app.
Step 2: Choose Your Desired Format (JPEG or PNG)
Once you’ve uploaded your photo, you’ll need to select the format:
- JPEG is generally the most widely accepted format for passport photos. It’s perfect for online submissions due to its smaller file size.
- PNG may be required in certain cases, especially if you need a lossless file or higher quality for print-ready photos.
Some tools, like PhotoGov, allow you to choose between JPEG and PNG depending on your intended use. JPEG works best for digital uploads, while PNG is ideal for printing.
Step 3: Adjust Size and Crop to Meet Required Dimensions
Next, the tool will automatically adjust the photo’s dimensions to meet the official passport photo standards (typically 35mm x 45mm). However, you may need to crop or resize manually for precise head positioning.
For example:
- The head should be centered, with the top of your head to the bottom of your chin typically falling within a specific measurement range (e.g., 32mm-36mm).
- Your eyes should be positioned at the correct height within the frame, typically around 2/3 of the photo height.
Tools like PhotoAiD automatically detect and adjust head size, but always double-check the result for accuracy.
Step 4: Verify Biometric Compliance
One of the key features of tools like PhotoGov and PhotoAiD is the biometric compliance checker. This feature scans your photo to ensure that it meets specific biometric standards, which include:
- Correct facial expression (no smiling or frowning).
- Proper head orientation (head must not tilt forward or backward).
- No shadows or reflections.
After cropping and adjusting, the tool will confirm that your photo is biometrically compliant. If any issues are found, the tool will prompt you to fix them before proceeding.
Step 5: Download Your Print-Ready Passport Photo
Once your photo meets all requirements, you’ll have the option to download it in JPEG or PNG format:
- For digital applications, download your photo in JPEG format at the required file size (usually 500 KB to 1 MB).
- For print-ready photos, ensure your photo is 300 DPI and download it in PNG format, ensuring it’s ready for physical submission.
PhotoGov offers the added benefit of a print-ready file that’s perfect for printing at home or at a professional print shop.
Bonus Tip: How to Print Your Passport Photo
For print-ready photos, follow these steps:
- Open your PNG file on your computer.
- Use a high-quality printer set to 300 DPI or higher for optimal results.
- Ensure you’re printing two passport photos per sheet on A4 paper if required by your country’s guidelines.
Alternatively, you can upload the file to a printing service for a high-quality physical copy.
Print-Ready Passport Photos: What You Need to Know
When preparing a passport photo for physical submission, ensuring it is print-ready is just as important as meeting the digital requirements. If you’re applying in person or mailing your documents, your photo must adhere to specific print specifications to avoid rejection.
Here’s everything you need to know about making sure your passport photo is print-ready:
1. Understanding Print-Ready Requirements
A print-ready passport photo is one that meets official size and resolution requirements for physical submissions. Governments usually specify exact standards for both image size and file resolution to ensure the photo is clear and recognizable when printed.
Key print specifications:
- Resolution: Your passport photo should be 300 DPI (dots per inch) for the highest quality when printed.
- File Size: Passport photos are typically required to be between 500 KB to 1 MB for digital submission. However, print-ready versions are often larger to accommodate higher resolutions.
- Dimensions: While passport photo dimensions are typically 35mm x 45mm, make sure your photo fits the required physical dimensions exactly.
- Color Accuracy: The photo should be full color with no filters or distortions.
If your tool (like PhotoGov or Passport Photo Online) provides a print-ready file, the system will ensure that all these parameters are set correctly for you.
2. How to Ensure Your Photo is Print-Ready
To ensure your passport photo is print-ready, follow these simple steps:
- Check Resolution: Ensure that the photo is 300 DPI. This is critical for sharp, clear prints. Most online passport photo tools automatically adjust this for you when generating print-ready files.
- Download the Correct Format: Download your photo in PNG format if you’re planning to print. PNG maintains the image quality better than JPEG when printing.
- Confirm Dimensions: Double-check that your photo dimensions are 35mm x 45mm. Tools like PhotoGov ensure that this is accurate automatically.
- File Size: Ensure that your file isn’t too large or too small for the printer. Passport photo printers typically require files between 500 KB and 1 MB for optimal printing.
Pro Tip: If you’re printing multiple passport photos on a single sheet (common for some applications), make sure the tool automatically formats the layout to fit two or more photos on an A4 sheet.
3. Printing Your Passport Photo
Once your photo is downloaded in print-ready format, you’ll need to print it. Here’s how you can get the best results:
Printing at Home:
- Use a high-quality printer with 300 DPI resolution.
- Print the photo on A4 photo paper. Some passport requirements state that you need to print two photos per sheet.
- Ensure the photo is printed without borders to avoid cutting off parts of the image.
Printing at a Service:
- Upload your print-ready PNG file to a professional print service.
- Request that they print the photos according to passport photo standards (dimensions, resolution, no borders, and plain white background).
4. Common Printing Issues to Avoid
Even when using the right tool and format, printing errors can occur. Here are some common issues to watch out for:
- Blurry Photos: Ensure your photo resolution is at least 300 DPI. If it’s lower, the print may come out blurry.
- Wrong Size: Always verify that the printed photo is 35mm x 45mm. Some printers may scale the image incorrectly.
- Poor Quality Paper: Use high-quality photo paper for the clearest print. Avoid printing on regular printer paper.
5. Final Checks Before Submission
After printing your photo, here’s a quick checklist to ensure everything is ready for submission:
- Dimensions: Measure the photo to confirm it’s 35mm x 45mm.
- Background: Make sure the background is solid and light-colored (white or off-white).
- Head Size and Position: Verify that your head is within the correct size range and centered in the frame.
- Print Quality: Ensure the print is clear with no pixelation or distortion.
If your photo passes all these checks, you’re ready to submit it with your passport application!
Common Issues with Passport Photo Tools and How to Fix Them
Even with the best tools at your disposal, creating a compliant passport photo can sometimes be tricky. Whether it’s due to incorrect sizing, resolution problems, or technical glitches, it’s important to be aware of the common issues that can arise when using passport photo format tools and how to fix them. Here’s a guide to help you troubleshoot and avoid rejections.
1. Incorrect Dimensions
One of the most common issues with passport photos is incorrect dimensions. Even if you use a tool like PhotoGov or PhotoAiD, there’s still a chance the photo might not meet the exact size requirements. This can happen if:
- The photo gets automatically resized incorrectly during the upload process.
- Your head is not positioned in the correct range for biometric standards.
How to Fix It:
- Double-check the crop: Ensure your face is correctly positioned within the frame and the dimensions are 35mm x 45mm (or the required size for your country).
- Use the tool’s preview feature: Most tools show a preview of the final photo size before you download it. This allows you to make adjustments before submitting.
2. Low Resolution or Pixelation
Another issue is low resolution. If the photo resolution is too low (below 300 DPI), it can appear pixelated or blurry when printed. This is especially important if you’re printing your passport photo for in-person submission.
How to Fix It:
- Ensure that your photo is 300 DPI if you plan to print it. Most tools, like PhotoGov, will provide a high-resolution file by default for print-ready downloads.
- If you’re using JPEG format, avoid compression artifacts that can reduce quality. Opt for PNG if you need the highest quality without losing any image data.
3. Photo Background Issues
Many passport photo rejections are due to background problems. The background should be plain white or light-colored, with no patterns or shadows. It should contrast with your face and clothing.
How to Fix It:
- Ensure no shadows: Make sure your lighting is even and there are no shadows on your face or background.
- If using a digital tool, ensure the background is automatically removed or edited to meet the requirements.
- Check for background distractions: Even slight variations in color or texture can lead to rejection. Some tools like PhotoAiD automatically check for background compliance.
4. Head Position and Expression
Another common problem arises when the head position or facial expression isn’t in compliance. For example:
- Head tilting: Your head should be upright and centered in the frame.
- Facial expression: You must have a neutral expression with no smiling or frowning.
How to Fix It:
- Check head alignment: Most passport photo tools like PhotoGov automatically check head alignment to ensure it’s centered. If needed, manually adjust the crop to ensure the top of the head is at the correct height within the frame.
- Facial expression: Ensure that you keep a neutral expression and don’t smile. If you’re unsure, the tool’s compliance checker should highlight any issues.
5. Incorrect File Format or Size
Even though you may choose the right format, file size can still cause problems:
- If the file is too large, it might not be accepted by the government portal.
- If it’s too small, the photo might not meet the quality requirements.
How to Fix It:
- Most tools will automatically optimize your photo for file size while maintaining good quality.
- If the file size is too large, try compressing it using the tool’s options (e.g., PhotoGov automatically provides the correct file size for submission).
- If the file size is too small, use a higher-quality format (PNG) and ensure the resolution is adequate.
6. Tool Glitches and Errors
Sometimes, you may encounter technical issues with the passport photo tools. These can include problems like:
- The photo not loading properly.
- Incorrect cropping that’s not aligned with the required dimensions.
- Inconsistent results when switching formats (JPEG to PNG, etc.).
How to Fix It:
- Refresh and retry: Sometimes a simple refresh can fix issues when uploading or processing a photo.
- Clear the cache: If you’re using a browser-based tool, clear your browser cache to ensure that the latest version of the tool is being used.
- Try a different tool: If the issue persists, switch to a different passport photo tool. For instance, PhotoAiD or PhotoGov offer reliable automatic fixes.
Final Troubleshooting Tips
- Always double-check your final photo: Before you download or print your photo, check for any issues with dimensions, resolution, or head positioning. Many tools allow you to view a preview of your final photo, so take advantage of that.
- Use an automated tool with biometric compliance checks to ensure your photo is up to standard.
- Ask for feedback: If you’re unsure about the photo’s quality, consider asking a friend or using an online review tool to double-check before submission.
By being aware of these common issues and how to fix them, you’ll avoid passport photo rejections and ensure your photo meets the necessary biometric and government standards.
Choosing the Best Passport Photo Format Tool
Now that we’ve covered everything from JPEG and PNG formats to print-ready photos, it’s time to wrap up and help you choose the best passport photo format tool for your needs.
Whether you’re preparing a photo for an online submission or need high-quality prints for physical applications, the right tool can make all the difference. Here’s a quick summary of what we’ve discussed and the best options available:
1. PhotoGov: The Best Overall Tool
If you want a reliable, one-stop solution, PhotoGov is your best bet. With its 100% acceptance rate, the tool guarantees that your passport photo will meet all biometric and government standards. It supports both JPEG and PNG formats, and offers print-ready options at 300 DPI, perfect for both digital submissions and physical printing.
Why choose PhotoGov?
- Automated compliance check: Ensures your photo is biometrically compliant.
- Support for JPEG and PNG: Offers flexibility for both online and print applications.
- Fast and user-friendly: Get your photo ready in minutes.
2. IDPhotoStudio: A Free and Simple Tool
For those on a tight budget, IDPhotoStudio is a great option. It’s free, easy to use, and provides basic cropping and resizing options. While it doesn’t offer biometric compliance checks or the highest resolution, it’s perfect for simple resizing tasks.
Why choose IDPhotoStudio?
- Free to use: No cost for basic photo resizing.
- Simple and straightforward: Ideal for users who need a basic tool for quick resizing.
- Supports JPEG format: Great for basic digital submissions.
3. Snapshooter: The Mobile Solution
If you’re always on the go and need to create your passport photo using your smartphone, Snapshooter is a great choice. The mobile app provides all the tools you need to take, crop, and adjust your passport photo directly from your phone.
Why choose Snapshooter?
- Mobile app: Take and edit your photo directly from your smartphone.
- Real-time preview: See how your photo will look in real-time, ensuring it meets all requirements.
- Supports both JPEG and PNG: Offers flexibility for all types of submissions.
Key Takeaways:
- PhotoGov is the best overall for users who need a complete solution that guarantees biometric compliance, with support for both JPEG and PNG formats and print-ready files.
- If you’re looking for a quick, automated fix, PhotoAiD offers AI-driven compliance checks that will save you time.
- For simple resizing tasks, IDPhotoStudio offers a free, easy-to-use solution, though it lacks advanced compliance features.
- Passport Photo Online is a solid option for those needing a quick, reliable passport photo, with a real-time preview of the final photo.
- If you need a mobile-friendly solution, Snapshooter is a mobile app that lets you take and edit passport photos from your phone.
By using one of these tools, you’ll be able to create a passport photo that meets official requirements, ensuring your application is processed smoothly and without delay.
Frequently Asked Questions (FAQ)
To help you further with your passport photo needs, here are some common questions about passport photo formats, tools, and photo compliance.
1. What is the difference between JPEG and PNG for passport photos?
- JPEG is the most commonly accepted format for passport photos because it offers a good balance between file size and image quality. It is widely used for digital submissions as it typically results in smaller file sizes.
- PNG, on the other hand, is a lossless format, meaning it retains all the image data. It is a great choice if you need a high-quality print of your photo, but it often results in larger file sizes. PNG also supports transparency, but this is usually not necessary for passport photos.
2. Why is DPI important for print-ready passport photos?
- DPI (dots per inch) is crucial for printing because it determines the resolution and sharpness of the printed image. For passport photos, you need a resolution of 300 DPI to ensure the photo is clear and meets official print standards. If your photo is low DPI, it can appear blurry or pixelated when printed, which could lead to rejection.
3. Can I use my smartphone to take a passport photo?
- Yes! You can use your smartphone to take a passport photo, but you must follow official guidelines carefully, such as proper lighting, neutral expression, and correct head size.
- Tools like Snapshooter offer mobile-friendly solutions that guide you through the process to ensure your photo meets all biometric requirements.
4. How can I verify if my passport photo meets the requirements?
- Many passport photo tools like PhotoGov and PhotoAiD offer an automated compliance checker that ensures your photo adheres to government standards. These tools check your head size, background, and photo resolution to ensure your photo is biometrically compliant.
- You can also manually compare your photo to official passport photo requirements provided by government websites.
5. What are the most common reasons for passport photo rejection?
- Incorrect background color: The background must be plain white or off-white, with no shadows or patterns.
- Wrong head position: Your face must be centered, with the correct distance between the top of your head and the chin.
- Poor resolution: If the photo is blurry or pixelated, it will not meet the required standards.
- Over or underexposed photo: Your face should be clearly visible, without shadows or overexposure.
6. Can I print my passport photo at home?
- Yes, you can print your passport photo at home as long as you meet the 300 DPI resolution requirement for clarity. Use photo-quality paper for the best results. You can also print multiple passport photos on an A4 sheet (most tools, like PhotoGov, will format this automatically for you).
7. What should I do if my photo is rejected?
- If your photo is rejected, you can re-upload a new photo using a compliant passport photo tool like PhotoGov or PhotoAiD. These tools automatically check for biometric compliance and official standards to avoid mistakes.
- Check for common rejection reasons (such as incorrect background, wrong head size, or low resolution) and make adjustments accordingly.